0

Food: Tomato Tart

I’ve been feeling a bit lazy in the kitchen the past few months. I think the last new recipe I tried was more than 3 months ago and I didn’t even bother to share it here. I don’t know if it’s moving to a new place and being overwhelmed by my to-do list for the house or wanting to try the restaurants in our new area that kept me from trying out something new.

Last week, I went through some of my favorite food blogs and picked a few simple recipes to try out. I also updated my pepperplate recipes – added some pictures and re-organized my list hoping that will motivate me to get back in the kitchen and surprise my husband with new dishes.

I came across the Tomato Tart recipe in tastespotting and thought “Hey! That’s pretty simple and I still have puff pastries in the freezer. I can do that!” – so I did. The recipe was originally posted in the Brown Eyed Baker blog. It’s basically the same recipe but I made a few adjustments as my initial attempt failed. 🙂

Tomato Tart Recipe

Ingredients:

1 sheet puff pastry, thawed
1 egg, lightly beaten
½ cup grated Parmesan cheese
2 plum tomatoes (or 1 large heirloom tomato), cored and sliced ¼-inch thick
½ teaspoon salt
4 ounces mozzarella cheese, shredded (about 1 cup shredded)
2 tablespoons olive oil
1 garlic clove, minced
2 tablespoons minced fresh basil

Steps:

1. Adjust oven rack to the second lowest position and preheat oven to 425 degrees F. Line a baking sheet with parchment paper.

Note: Original recipe had the rack at the lowest position but the bottom of my crust was so brown the first time so I had to adjust.

2. Place the puff pastry in the center of the baking sheet and brush all over with the egg. Form a crust by folding over the edges about a ½ inch. Use a paring knife to cut the folded edges and corners. Brush the pastry and the edges all over with egg.

Note: Original recipe brushed the pastry with egg before folding over and forming crust. I switched these two steps as brushing the pastry made the dough sticky and difficult to fold. Consider rubbing flour between your hands for easier dough handling.

3. Poke the dough all over with a fork, making sure to go the whole way through the dough.

4. Sprinkle evenly with the Parmesan cheese. Bake until golden brown and crisp, 10 to 15 minutes. Transfer to a wire rack and let cool.

Note: I adjusted the time to 10 to 15 minutes instead of the originally suggested 15 to 20. I first set my timer to 15 minutes and I got a really brown crust. Every oven is different so check your dough every 5 minutes to make sure you don’t burn the crust.

5. Meanwhile, place the tomato slices on a triple layer of paper towels. Sprinkle with the salt and let sit for 30 minutes.

6. When ready, sprinkle the shredded mozzarella evenly over the bottom of the crust. Press any excess moisture out of the tomatoes with paper towels, then layer the tomato slices evenly over the mozzarella. Whisk the olive oil and garlic together and drizzle evenly over the tomatoes. Bake until the crust is deep golden brown, 10 to 15 minutes.

7. Let cool on a wire rack for 5 minutes, then sprinkle with basil. Slide the tart onto a cutting board, slice into pieces and serve.

Original recipe: http://www.browneyedbaker.com/2013/07/16/tomato-mozzarella-tart-recipe/

0

Meeting Wolfdogs

Ever since dog sledding during my birthday last January, I’ve been researching which big dog we can adopt/purchase for our home. Then two weeks ago, I was googling other activities in Canmore and came across this link about the Yamnuska Wolfdog Sanctuary and saw that they have wolfdogs up for adoption. What?! I can actually have a half wolf in my family?! Of course, I started imagining being a Stark and having my own wolf to defend me just in case those White Walkers attack. When I finally realized I’m not fiction, I got in touch with one of the founders, Georgina, and booked a visit.

Fullscreen capture 612013 113816 PM

A visit to the sanctuary costs 20/head and all proceeds go towards rescuing more wolfdogs. Aside from rescuing wolfdogs, YWS also aims to correct myths about wolves and wolfdogs and provide educational programs regarding caring for wolfdogs and the importance of preserving wild wolves in their natural environment.

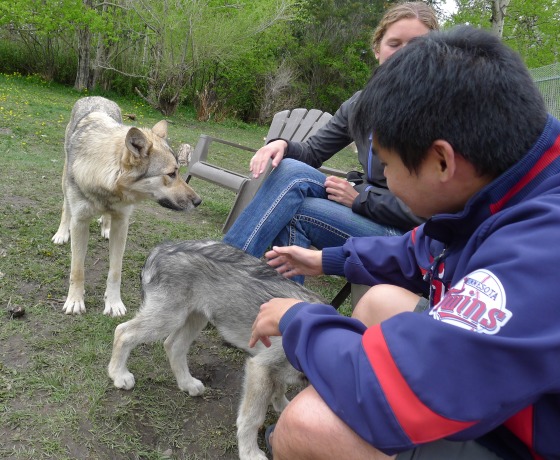
Upon entering, we were told to sit so as not to intimidate the wolfdogs and encourage them to approach us. The first dogs to welcome us were Nikki and Kaya the puppy.

P1090464

Nikki and Kaya being friendly

The others wolfdogs in the pack are Zeus – the alpha male, Kuna – the alpha female and Nova

Zeus and Nova watching us from afar

P1090484

Kuna showing off her long legs

Nikki is a low content wolfdog which means that she exhibits more dog traits. She’s very friendly and even allowed us to pet her when we first got to the sanctuary and came closer every time she’s called. Kaya is a high content wolfdog who’s very playful and even had her paws on Sherlock’s laps the moment she saw him.

Nikki (L) and Kaya (R)

Nikki (L) and Kaya (R)

Georgina explained that contrary to how they are presented in movies/books, wolves are not known to attack humans and will most likely run when approached. In over a century, only two attacks on humans have been recorded. The adult high content dogs, Zeus, Kuna and Nova, never came close to us and even stepped back when we moved on our seats.

Zeus (L) and Nova (R)

Zeus (L) and Nova (R)

Zeus the alpha male of the pack is responsible for keeping everybody safe. Don’t you just love those piercing yellow eyes?

Zeus

Zeus

Kuna is the alpha female or the diva of the pack. She is such a beautiful animal and has legs of a supermodel.

Kuna

Kuna

Nova is a one year old half-arctic wolf. He’s only year old but he already looks so big!

Nova

Nova

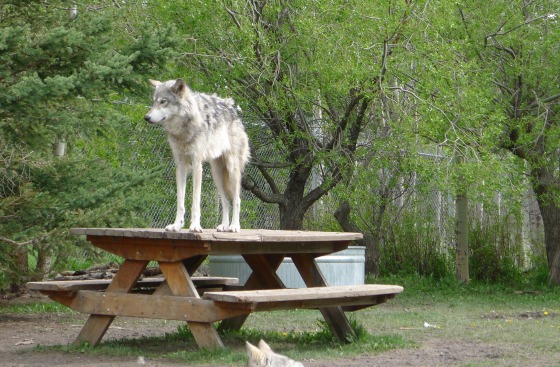
Wolfdogs, especially high content ones, do not live to please humans. Unlike other dogs, they do not welcome and wag their tails at you when you get home. Most likely, they will not approach when you call them. It’s not that they don’t know their names, it’s just that they do whatever pleases them. Georgina tried calling Kuna who looked at us with one eye then went back to her nap on her throne the picnic table.

P1090482

Kuna sleeping and cannot be bothered even by treats

They can be very expensive pets eating up to 10 lbs of food per day. With all those food, they also require a lot of exercise which means walks/runs three times a day or else they’ll be bored and do crazy things like chew on random things and dig. If you have an 8-hour job, it may not be a good idea to have them as pets.

Nova checking out the perimeter

They are also very territorial animals. Say you take them out to a dog park and they decide that they are the alpha of the pack in the park, when a new dog comes to that park, chances are the wolfdog will see the new guy as a threat to his current pack and attack it.

P1090475

After our visit, we’ve decided that a high content wolfdog may not be the best match for us. Sherlock and I both have 8-hour jobs, we don’t have a fence that can contain these strong animals, and we lack the proper knowledge to care for and train them. My dream of having a wolf in our family may have been crushed but I am still grateful that we live less than an hour away from this sanctuary and we can visit again to see these beautiful creatures.

I love Kuna!!

I love Kuna!!

0

Learning How to Bike at 29

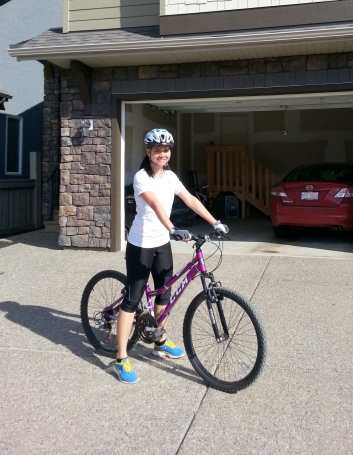
At age 29, I finally learned how to ride a bike! Last Sunday, I finally succumbed to my husband’s constant nagging and trained for an hour and a half. I’m still not good at it and I still need a lot of practice especially with biking on narrow spaces, turning, and starting on my own but I’m extremely happy that I can finally get on a bike and ride a few hours a day.

I’ve always wanted to learn but I thought being seen with training wheels is too embarrassing for an adult . Sherlock convinced me that he’ll assist and teach me instead but that plan failed and we just ended up annoying each other. So we consulted Mr. Google, watched several how-to videos and found other more effective methods that we combined into what worked for me.

Here are the steps I followed:

Step 1. Adjust the seat at a height where you can still comfortably put your feet on the ground while you’re seated. 

20130529_174322

This was very important for me since it made me more confident that I won’t injure myself knowing I can safely land on my feet should I lose my balance.  I also picked a lighter mountain/comfort bike because a heavier bike would probably drag me to the ground during my moments of panic. You might want to tilt the front of your seat down a little because depending on the material of your seat, walking with your bike can be painful for your manly/lady parts 🙂

Step 2. Remove both pedals

Some parents no longer train their kids with training wheels but instead use training bikes w/o pedals which teach kids to balance the bike first before pedaling. Those bikes can be pricey and you probably won’t be need them for long so just take out your tools and take out the pedals yourself.

Step 3. Find a slightly downhill paved path

Empty slightly downhill road near a construction area

My husband found this slightly downhill road in our community that doesn’t have a lot of traffic during the weekends. It was perfect but being a busy construction on weekdays, it had a lot of little rocks and dirt which made my first day of learning a little bumpy. Other videos also recommend a space with grass so there’s less impact and scratches should you fall.

Step 4. Go to the top of the hill and get on your bike. Do a walk and glide with your bike 

Some videos recommend walking with the bike several times until you feel comfortable being on the bike. Then walk a few steps and slightly lift your feet off the ground to glide. Being the impatient person that I am, I started with the walk/glide combination right away. The end goal is to be able to feel comfortable gliding continuously from the top until the bottom of the hill. This is my tenth try:

Step 5. Put the pedals back on

Then get on your bike again and put your feet on the pedals as you glide.

Step 6. Try pedaling and tadddaaa!!! You’re biking!!! 🙂 

Please do not mind what my husband is saying. He’s basically just teasing me being the annoying  loving husband that he is 😛

Then try biking on a path with no incline and a slightly uphill one. It might be difficult adjusting from going downhill to a path with no incline so ask a friend to give you a little push at first.

2

Food: Sushi Making Class

Sherlock and I went to our first cooking class today as our post-Valentine’s Day celebration. We usually cook something special and eat in during Valentine’s Day but we wanted to do something different so we signed up for the Sushi Making Class at The Cookbook Co. Cooks.

The class is priced at $90/head and goes for 2 1/2 hours (with a 15-minute break). Aside from the class,  they also provide all the ingredients, all the utensils needed, the recipe of the sushi made in class, an apron and some sake. The students also get to eat the food during class or take them home.

Most of the ingredients/utensils that will be used for class

Most of the ingredients/utensils that were used in class

Our instructor is Chef Hiro Atari of Zen Japanese Restaurant in downtown. You know you’re going to have fun if your chef instructor opens his class by playing the guitar and singing a sushi song he wrote. 🙂 He then gave some tips how to prepare and cook the rice and gave an impressive demonstration of how to filet a salmon.

Menu for the class as provided by Chef Hiro. The recipes are also included in the packet

Menu for the class as provided by Chef Hiro. The recipes are also included in the packet


We then moved to making some Nigiri sushi. Chef Atari said that though a Nigiri looks so simple, it takes two to three years to completely master the art of making it. I was surprised that a Nigiri is supposed to have just very little rice with it. Most of the places I’ve been to, especially all-you-can-eat ones, serve Nigiri with almost double the proper amount. I learned that the proper way to eat a Nigiri sushi is to dip the fish side of the sushi in soy sauce, not the rice side, to keep the rice intact. Another way is to take a slice of pickled ginger, dip it in soy sauce and use the ginger to brush the  fish with soy sauce. Also, it is ideal to eat a piece of pickled ginger after each sushi to cleanse the mouth and fully appreciate the freshness of each fish.

Top - bottom: tuna, salmon, shrimp, eel

My Nigiri sushi creations! 🙂 Top – bottom: tuna, salmon, shrimp, eel

Temaki sushi is the sushi that’s served in what looks like a seaweed cone. This is the easiest sushi to make and is ideal for sushi parties because guests can pick what ingredients they want in their sushi and roll their own cone. Before the break, we were given chilled sake and a quick lesson about the difference between chilled and hot sake.

My favorite part of the class was making the inside and outside rolls. I learned that one roll can actually be a full meal because of its rice content. For an inside roll we were told to make a ball of rice that’s about the size of a tennis ball and for an outside roll the size of a baseball.

Making California Masago roll (avocado, cucumber, crab mix and roe)

Making California Masago roll (avocado, cucumber, crab mix and roe)

Making rolls is serious business

Making rolls is serious business

Avocado, then topped with crab mix then a slice of cucumber

Avocado, then topped with crab mix then a slice of cucumber

Sherlock's outside rolls

Sherlock’s outside rolls

We were also told not to slice the rolls until we are ready to eat them so they will stay fresh longer. Since I was already so full from the Nigiri and Temaki sushi, I had to take home all the outside and inside rolls. For dinner, I sliced the cucumber roll and salmon maki and made my plate pretty. 🙂

Cucumber (inside roll) and Salmon maki (outside roll)

Cucumber (inside roll) and Salmon maki (outside roll)

My main agenda for attending this class was to learn how to properly make rolls but I learned so much more about sushi in general and sake. Thanks Chef Hiro Atari for making the class so much fun and engaging! Thanks The Cookbook Co. Cooks for coordinating this class! I will definitely be back for more classes. 🙂

0

1 Year in Canada!

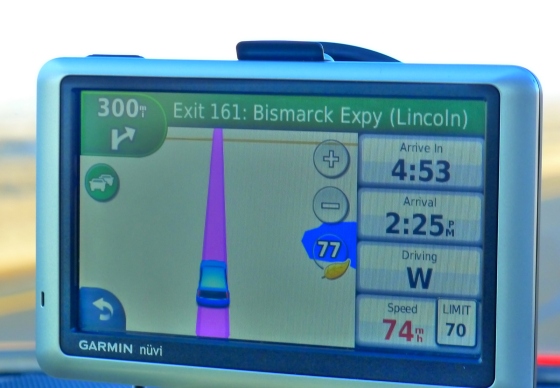
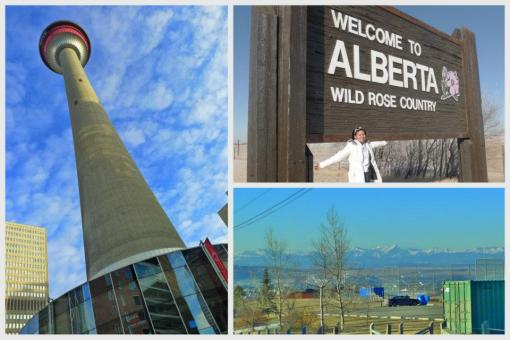
A year ago, my husband and I packed our bags and drove a little over 2000 miles from Minnesota, USA to Alberta, Canada. It was the longest road trip we’ve ever driven and one of the scariest and most exciting experiences of our lives. I had been traveling back and forth between Minnesota and Manila for work before but none of that was as crazy as packing almost all of our possessions in our Mazda 6 and moving to a city/country we’ve never been to where we only know three people. We’d already spent a good amount of money and time applying and processing our Permanent Resident status that it wasn’t a make or break situation – there is no break, it’s a “make it work” situation.

We first stopped at North Dakota, then Montana then entered Canada through Coutts

We first stopped at North Dakota, then Montana then entered Canada through Coutts

The drive was pretty great except on the second day when it snowed early morning in North Dakota

The drive was pretty great except on the second day when it snowed early morning in North Dakota

Welcome to Alberta! :)

Welcome to Alberta! 🙂

Our first biggest hurdle was looking for a place to rent. It was pretty tough because we knew very little about Calgary and online research can only go so far. Also, at that time we didn’t have jobs and of course landlords want proof that you can actually pay your rent and bills. Just so we can get the place we loved, we gave our landlord the security deposit and advanced payments for 3 months. Though that one really drained our savings, I thought our place is worth all the hassle.

The first room we finished  is our bedroom

The first room we finished is our bedroom

Living area, the second bedroom that we turned to  an office, and upgraded kitchen and bathroom

Living area, the second bedroom that we turned to an office, our small very functional kitchen and bathroom

After settling in our new place and getting our driver’s license, health cards and credit cards, we finally had the chance to get to know the city a little bit more. Here is a list of what I love about this city:

  • Close to the mountains

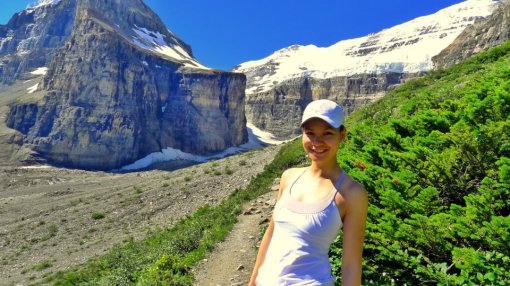
We’re so close to the mountains, that we hiked in Banff/Lake Louise almost every weekend last summer. In the winter, you drive an hour and you can treat yourself to a day of skiing, snowboarding, snowshoeing, dog sledding or ice climbing. Or if you’re not into those, just sit on a bench around Lake Louise and admire the view.

Morraine Lake - my fave view in the area

Morraine Lake – my fave view in the area

Athabasca glacier, Peyto Lake, Lake Minnewanka, Spray Lakes

Athabasca glacier, View from Little Beehive, Lake Minnewanka, Spray Lakes

  • Wide variety of cuisines

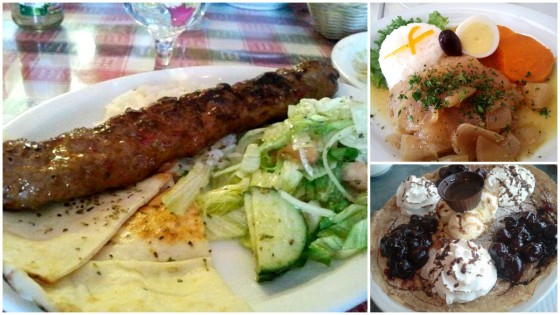
The good thing about being a melting pot is the variety of cuisines you see in the food industry. Just right across from our place you can have Taiwanese, Vietnamese, Mediterranean, Korean, Chinese or Mexican. There are also a ton of Canadian restaurants, Japanese places and other cuisines I’ve never had before like Turkish, Bangladeshi, Peruvian, etc. There’s also a ton of exotic groceries around the city.

Peking duck, Japanese rolls, Pad Thai

Peking duck, Japanese rolls, Pad Thai

Spicy Kebab, Escabeche De Pollo, Dutch Pancake

Spicy Kebab, Escabeche De Pollo, Dutch Pancake

Grilled cheese, perogies, poutine

Grilled cheese, perogies, poutine

  • Lots of volunteer opportunities

In just a year, I’ve volunteered as a kitchen assistant, sales person, events assistant, usherette for a theatre and gallery and researcher for democratic issues. I love how people here are so willing to donate their time to make an event/cause successful without expecting anything in return.

I volunteered in the souvenir area of Va'a World Championships

I volunteered in the souvenir area of Va’a World Championships

Our first year in Canada started out pretty tough but I think overall the past 12 months were still great. I know we’ve still got a long way to go before we can claim that we know Calgary really well but so far what we’ve seen and experienced is enough for us to love this city. I think we’ve found our second home here in Calgary.

1

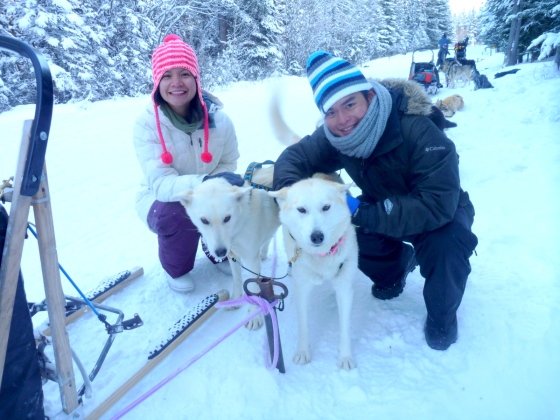
Travel: Dog Sled Tour – Canmore, Alberta

I was so happy when my husband told me that we were going dog sledding for my birthday! I was so excited that on the days leading up to my birthday, all I did was look at dog sledding videos and pictures online (sorry work! :)).

We booked our tour with Snowy Owl Dog Sled Tours. They charge $150/head for a two-hour tour which covers the tour itself and transfers from their Canmore office or a hotel in Banff . You can opt to drive up to Spray Lakes but if you’re not the best winter driver and you don’t have the best winter tires, I suggest you take Snowy Owl’s van as the road is quite slippery and their drivers are really good at what they do.  The two-hour tour doesn’t include the drive up to Spray Lake but it does include a 30-minute orientation in the beginning and a few minutes at the end for some snack so you get about at most an hour and a half of sledding.

Inside the van eager to start sledding!

Inside the van eager to start sledding!

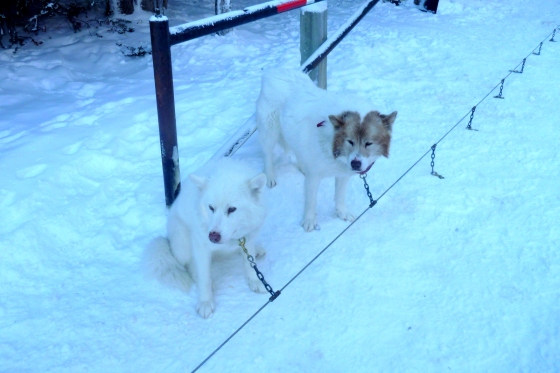
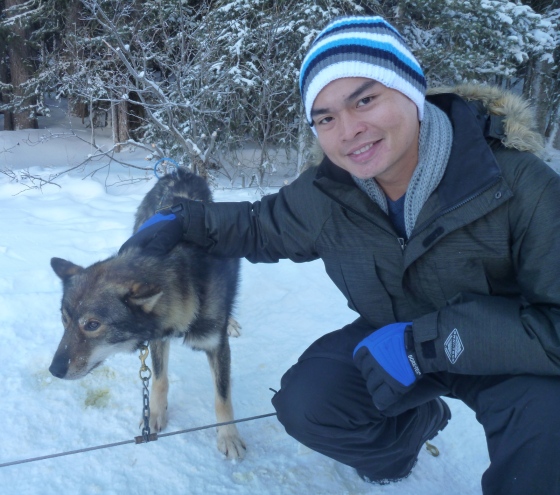
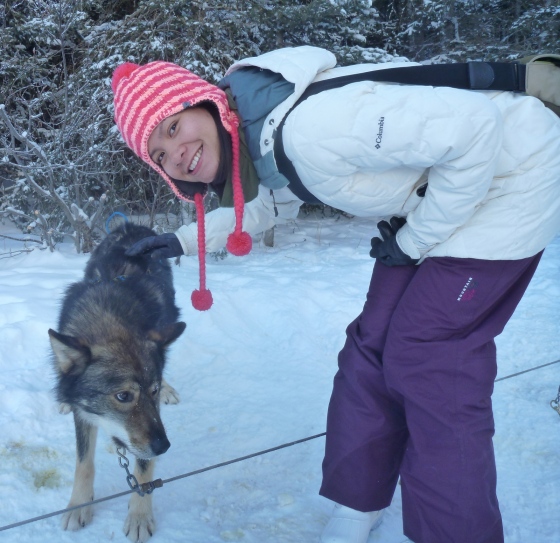
Upon arriving at Spray Lakes, we got to pet the display dogs – some of them are rotated with the actual sled dogs and some of them are injured or would rather roll in the snow that they’re constant display dogs. Most of the dogs are friendly but some who are considered shy have red bandanas around their neck to warn guests.


Be ready to be charmed by these puppies

Be ready to be charmed by these puppies

This dog only wants to roll in the snow...no sledding for this guy!

This dog only wants to roll in the snow…no sledding for this guy!

He likes getting our attention

He likes getting our attention

We were gathered by our lead guide Chris who introduced us to the different breeds of dogs they have. It’s amazing how they have over 180 dogs and the guides know the names and personalities of each one. We were also taught how to operate our sleds as most of us will drive our own sleds. We learned the basic stuff like “Hike!” gets the dogs running, “Whoa…” makes them stop and other things like how to slow down on a downhill and assist the dogs on uphills.

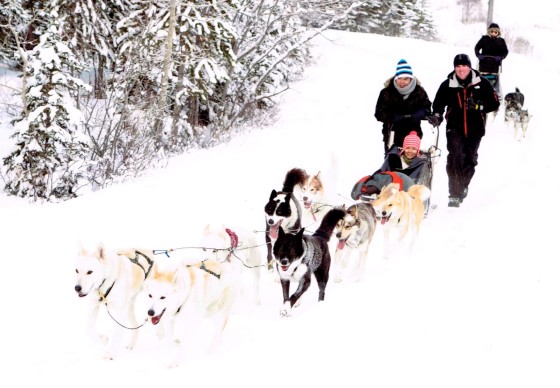
There were about 15 sleds going out

There were about 15 sleds going out

This guy is so huge! I wanted to take him home with us

This guy is so huge! I wanted to take him home with us

This pup gets between my husband's legs every time he steps on the sled

This pup gets between my husband’s legs every time he steps on the sled

The views from the sled were fantastic. There was a good snowfall a few days before we went sledding so the snow was still pretty fresh. The trees were mostly covered with snow which just made the views even prettier. During the tour, Craig (our guide) told us the names of dogs in our team and their naming system so it’s easy for them to remember all the dogs.

View of the mountains while on the trail

View of the mountains while on the trail

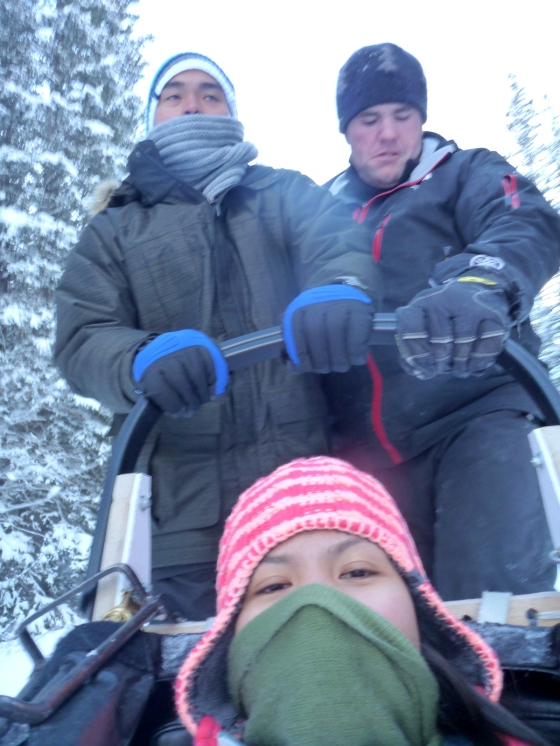
Me, my husband and our guide Craig

Me, my husband and our guide Craig

One of the photo souvenirs

One of the photo souvenirs – sold separately for 15 bucks each

It was about -18 that time and upon reaching the midpoint of the tour my hands were already freezing. Luckily, Craig lent us better gloves that were incredibly warm and I got to enjoy the tour better. The midpoint of the tour was at the middle of the frozen Spray Lake and the view from there alone was worth more than the price of the tour. Also, most sleds switch drivers at midpoint so everyone gets a chance to try actually driving. It isn’t really all that difficult and it is good cardio in the uphills.

Right in the middle of the frozen Spray Lake

Right in the middle of the frozen Spray Lake

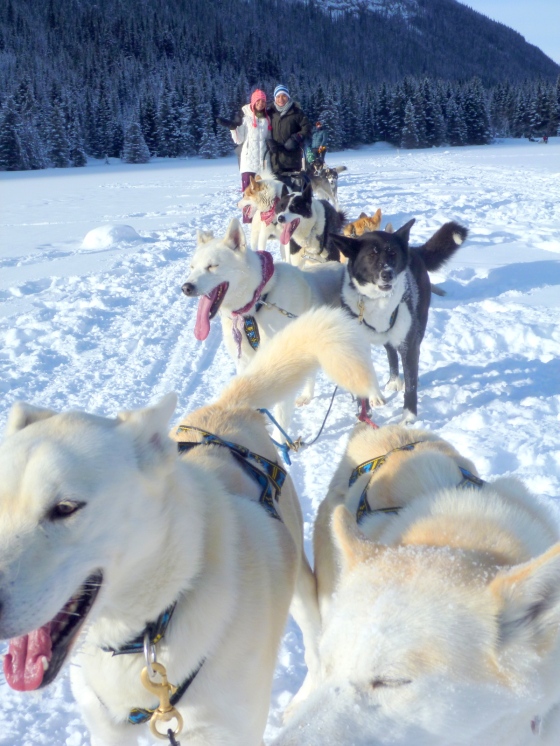
Here's our team!

Here’s our team!

At the end of the tour, we got to cuddle our lead dogs for a little bit then we all gathered around the fire for some cookies and warm apple cider. The guides also surprised me with a birthday cake and we all shared stories while waiting for our ride back to Canmore/Banff.

Meet Moonracer and Ducati

Meet Moonracer and Ducati

Everyone gathered around the fire for some munchies

Everyone gathered around the fire for some munchies

My dog sledding birthday cake! It's cute and yummy!

My dog sledding birthday cake! It’s cute and yummy!

If dog sledding isn’t in your bucket list, you need to find a place for it somewhere and if you do decide to experience it in Canmore, I highly recommend booking with Snowy Owl. It is definitely one of the best things I have ever experienced in my life and if you are not a dog lover, you will definitely find yourself wanting to cuddle with a husky or a malamute friend after the tour. If you’re still not convinced, maybe this video will help:

0

I’m 29!

Today I realized that turning 29 isn’t so bad. For the past few years, I’d always get scared of turning a year older because most of the time I don’t know what I want or I feel like I’m reaching that 30th mark and I still haven’t accomplished enough.

Then I go back to pointers I’ve learned from these three resources that have somehow helped shape my decisions and actions:

1. 7 Habits of Highly Effective Teens

7 Habits of Highly Effective Teens

I was in my first year in college when a block mate of mine lent me this book. It was written by Sean Covey, son of the author of “7 Habits of Highly Effective People” the late Stephen Covey. It follows the same principles as the adult version but written in a manner that would appeal more to the younger group – more specific to teen problems and with pictures. I’ve learned so much from this book and up to this day, I still try my best to practice all 7 habits but here are those that made a big impact on me:

  • I have control over my emotions
  • Begin with an end in mind
  • Seek first to understand, then to be understood
  • Sharpen the saw

2. The Secret

The Secret

Basically, The Secret is about the law of attraction which teaches you that you attract what you think about. So if you want positive things to happen to you, think about it. If you keep thinking about negative things then you’ll attract negative things. Though I do not agree with some of the points discussed in the book, I liked The Secret because it taught me to do true positive thinking. For example, though an anti-obesity campaign may sound positive, it focuses on eradicating the negative so instead do a healthy living campaign because this actually focuses on something positive.

3. Baz Luhrmann – Everybody’s Free To Wear Sunscreen

This came out during my junior or senior year in high school and I immediately liked it because of the catchy chorus. So I looked for the lyrics but instead found myself a guide on how I should look at myself and how I should treat others. Most of the single-word tips taught me that doing even the simplest things can have a huge impact on yourself and those around you:

  • Sing
  • Stretch
  • Floss
  • Dance
  • Travel

Some of my favorite lines from the song are:

  • Don’t be reckless with other people’s hearts. Don’t put up with people who are reckless with yours
  • The race is long and, in the end, it’s only with yourself
  • Get to know your parents. You never know when they’ll be gone for good.
  • Don’t feel guilty if you don’t know what you want to do with your life
  • Don’t expect anyone else to support you

I’m grateful that I came across these resources that helped me through heartbreaks, failures, denials, embarrassments, etc that may have been too much to handle for a teenager or a girl in her twenties. I’m also very lucky to have met a lot of people who believed in what I can do, did crazy dances and karaoke sessions with me, traveled with me, cried and laughed with me, and told me the brutal truth. Thanks, thanks and more thanks for helping me be the 29-year old girl I am now!

0

2012 Firsts

Most of the 2012 things I am thankful for happened while fulfilling my resolution of experiencing something new every month. This resolution made me realize that though a new gadget or a new pair of shoes can give you some sense of satisfaction, nothing compares to the high you get after experiencing something you’ve never done before or something you’ve been wanting to do. 2012 was all about learning new skills, conquering fears, strengthening relationships, meeting new people and seeing new places.

A list of my firsts in 2012 🙂

  • Travel: Cancun, Mexico

426792_10150649507853140_211508169_n

  • New Skill: Handgun training
  • Drove 3 days from Minnesota to North Dakota to Montana to Canada
  • Major life change: Moved to Calgary, Alberta as a Permanent Resident

427448_10150670357268140_1804889258_n

  • Moved in to our first apartment in Calgary
  • New Skill: Learned how to play golf

385640_10150766334678140_1362768304_n

  • Seen Banff, Lake Louise and Icefields Parkway in spring time
  • Walked on glacier at the Icefields Parkway
  • New Skill: Learned how to cook live crabs
  • Major life change: Resigned from my job of 8 years

165702_10150109686863140_2301901_n

  • Travel: Ottawa, Ontario and stayed there for two weeks

382390_10151097563023140_226116424_n

  • Celebrated my first Canada Day in Ottawa – saw the Prime Minister and Governor General!
  • Watched the orchestra: Lord of the Rings: Fellowship of the Ring In Concert

487825_10151097702678140_56292168_n

  • Travel: Montreal, Quebec

319455_10151100084023140_420756522_n

  • Volunteered with Family Services, Canadian Breast Cancer Foundation and Va’a World Championships
  • Visited the observatory – seen the Milky Way, Saturn, Mars, an iridium flare and learned about stars and constellations
  • Traveled to Drumheller, Alberta and learned a ton about dinosaurs/fossils
  • Watched a live CFL game – BC Vs. Alberta
  • Seen Banff and Lake Louise in the summer
  • Off  my bucket list: Hike in Banff/Lake Louise (Plain of Six Glaciers, Morraine Lake, Rock Pile Trail, Lake Agnes, Mirror Lake, Little Beehive, Big Beehive, Mt. Fairview)

480030_10151162490493140_1425952423_n

  • Started with my first job in Canada
  • Watched a showjumping competition
  • Travel: Vancouver and Whistler, British Columbia

580891_10151281961148140_1251305485_n

  • Conquered fear: Gondola ride from the peak of Whistler to the peak of Blackcomb Mountain
  • Watched the ballet
  • New Skill: Tried Moksha Hot Yoga
  • New Skill: Baked cookies
  • Travel: Punta Cana, Dominican Republic

301717_10151418666868140_1835511000_n

1

Food: Molten Chocolate Cake

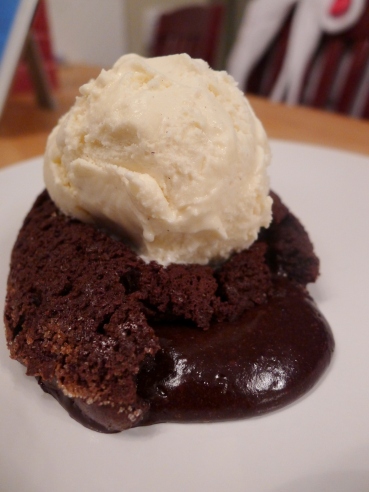
You know Chili’s Molten Chocolate Cake? I’m sure this is not the same recipe but as per my taste tester, this version certainly tasted like Chili’s – only better. For someone who doesn’t bake, that made me proud of myself. 🙂 Why better? Well this recipe does not use flour so it’s way lighter than the Chili’s version. Also it’s made at home so it may not be the healthiest choice but at least I know exactly what’s in it and it’s a lot cheaper.

This recipe is by Anna Olson. I’ve seen it during her chocolate ganache episode and I thought hey, that’s not so difficult. Of course, my first batch was not successful as it had more molten chocolate than cake. I chilled the ganache longer, let the cake rest longer  and added a few more minutes to baking time and it resulted to a really successful batch.

Molten Centre Chocolate Cake

Ingredients:

Ganache:

  • 1/4 cup whipping cream
  • 2 oz semisweet chocolate chips

Cake:

  • 1/2 cup unsalted butter, cut into smaller pieces
  • 4 oz semisweet chocolate chips
  • 2 large room temperature eggs
  • 2 large room temperature yolks
  • 1/4 cup sugar
  • 2 tablespoons cocoa powder
  • vanilla ice cream to top

Steps:

Ganache:

  1. Heat the cream until it begins to simmer
  2. Pour cream over chocolate chips and let sit for a minute
  3. Stir with a spatula starting from the center and widening the circle until chocolate has melted and ganache is smooth
  4. Chill until firm, about 2-3 hours

Cake:

  1. Preheat oven to 425 F
  2. Grease 5 oz ramekins and coat them with sugar. Shake of excess
  3. Melt the butter and chocolate in a metal bowl placed over a pot of gently simmering water. Stir until smooth then remove from heat
  4. In a separate bowl whip the eggs, yolks, sugar until they have doubled in volume – about 4 minutes
  5. Fold in the melted chocolate
  6. Sift the cocoa powder and fold in using beaters
  7. Divide batter between the 4 ramekins and chill for 15 minutes
  8. Spoon the chilled ganache into 4 truffles
  9. Gently place one truffle into the center in each of the cakes. Press down but not to the bottom of the ramekin
  10. Place ramekins on a baking pan
  11. Bake cakes for about 10 minutes or until the top of each cake has domed a little
  12. Let cakes sit for at least 2 minutes
  13. Lift each using a towel and run a spatula around the cake to loosen
  14. Place a plate overtop the ramekin, invert and lift ramekin
  15. Place a scoop of vanilla ice cream on top and enjoy!

Notes:

1

Food: Choco Chip Cookie by Anna Olson

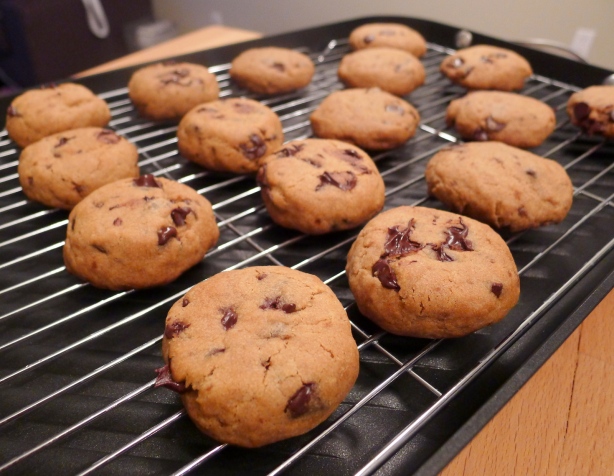
Growing up, I never really liked baking. I love cooking but hated baking as I never liked mixing batter/dough, waiting several minutes to bake and more minutes to let the pastry cool. Also, if I did something wrong pre-baking there’s no way to correct it. Baking felt more like a science project that actual cooking. Then I moved here to Calgary and was introduced to Anna Olson’s baking show in Food Network. I love how clean and organized her set is and how she makes baking look so easy. The show starts with the most basic recipe and then use that same recipe to create more complicated pastries.

She convinced me so I decided to bake my first ever batch of chocolate chip cookies. My first batch was a failure – they came out more like choco chip sheets than cookies. 🙂 Thanks to my friend who pointed out that maybe I had way too much oil in my pan so I gave it another go and the second round was a success!! I love the recipe as it’s really easy and the cookies came out moist and close to Chips Ahoy Chewy’s texture – perfect to pair with ice cream!!

Chocolate Chip Cookies

Ingredients:

  • 3/4 cup softened unsalted butter
  • 3/4 cup brown sugar
  • 1/4 cup granulated sugar
  • 1 egg
  • 2 teaspoons vanilla extract
  • 2 cups all purpose flour
  • 2 teaspoons cornstarch
  • 1 teaspoon baking soda
  • pinch of salt
  • 8 ounces semi sweet chocolate

Steps:

  1. Preheat oven to 350F
  2. Cream together butter and sugars in a bowl until smooth
  3. Add in egg and vanilla
  4. Stir in flour, cornstarch, baking soda and salt
  5. Stir in chocolate chips
  6. Drop by tablespoons to a pan lined by parchment paper
  7. Bake for 8 minutes
  8. Let cool and enjoy!

Notes: